

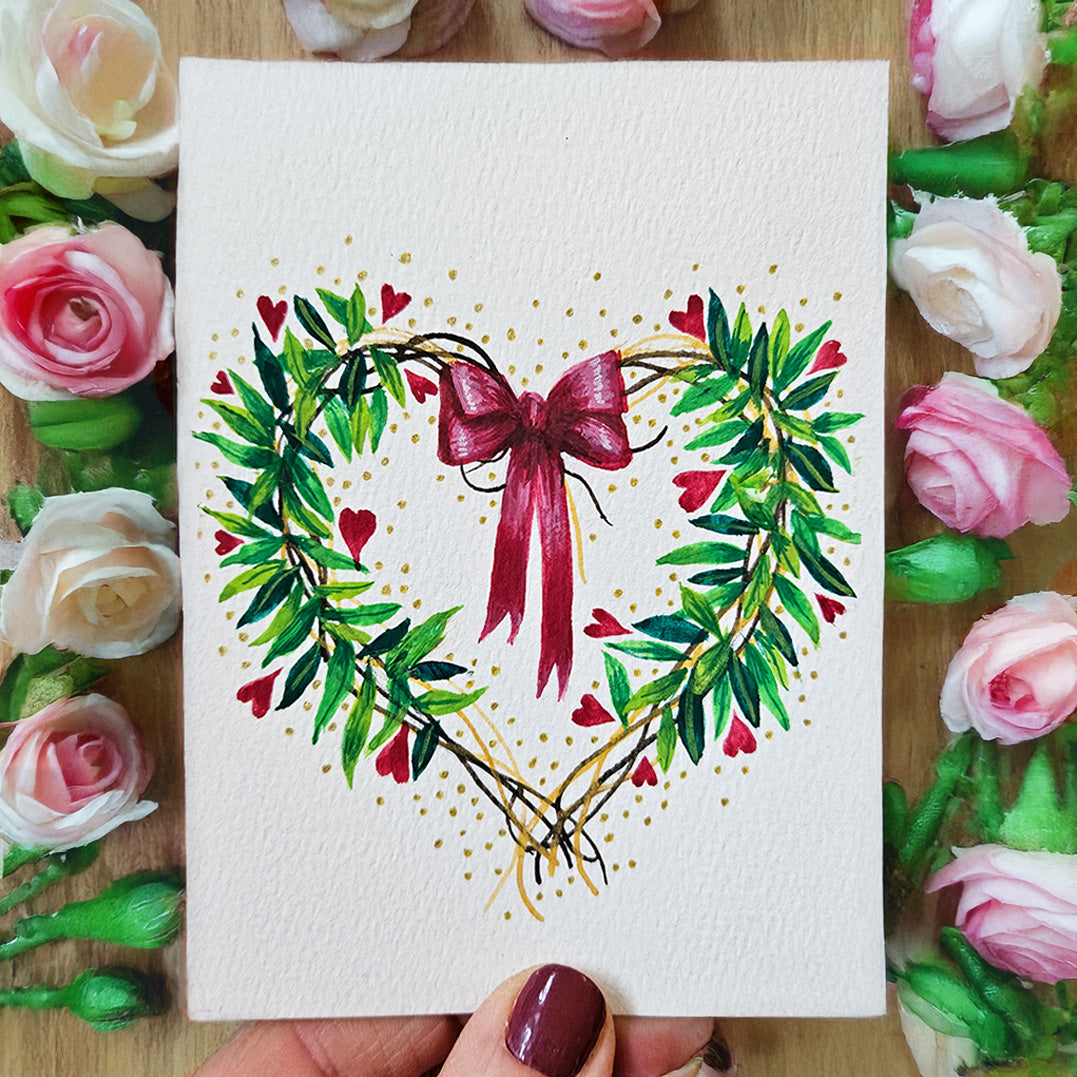

Whether you're making a homemade Valentine's Day card for a partner, a friend, or just for fun, this easy-to-follow tutorial from resident artist Hannah shows you how to recreate a super cute rustic heart design in creamy, vibrant gouache paint.
Express your love in the most heartfelt way—make your own Valentine's card and warm someone's heart.

What You’ll Need
To create your own Valentine's card, you'll first need to gather your materials. I used:
• Castle Arts 24-Piece Premium Gouache Set (used in this tutorial: Alizarin Crimson, Cadmium Yellow, Yellow Ochre Deep, Emerald Green, Prussian Green, Burnt Umber, and Chinese White).
• Castle Arts Watercolour Paper 230gsm Sketchpad (A5) or a similar sized piece of card or paper (suggested minimum weight 200gsm) plus a spare piece of paper for practising techniques.
• A small round watercolour/gouache brush (size 3 or similar), a larger, round watercolour/gouache brush (size 6 or similar), a watercolour/gouache liner brush (optional)
• A paint palette or old plate for mixing
• Some kitchen paper to blot brushes
• A graphite pencil 2H/H/B
• An eraser
• A gold gel pen or fineliner
• Fresh tap water in an old glass, tin, or jar.
Step 1

First, fold a piece of A5-sized watercolour paper or card neatly in half. On the front of the card, draw a heart shape in pencil, either freehand or using the template below. It doesn’t have to be accurate - this is a rustic heart - and your painted lines won’t follow the guide exactly. Use light pressure so you can erase the pencil marks at the end.
Step 2

Next, take a thin paintbrush (I used a liner but you could use your size 3 round) and mix a little water with some Burnt Umber gouache to loosen the paint to double cream consistency.
Roll your brush in the paint to make sure the bristles are loaded with paint (but not dripping) and keep a nice point. Start to lay down some lines to represent vines, using light pressure and long, fluid strokes, roughly following the heart shape but weaving in and out a little and adding some curlier lines at the top and the apex of the heart for interest.
Aim for around 3 wavy lines around each side of the heart. You might find it helpful to turn the card as you go. Allow the paint to dry.
Step 3

Clean your brush and repeat the process, this time using Yellow Ochre Deep paint, weaving the lines in and out of the Burnt Umber ones. Don’t worry if they’re uneven; it adds to the charm! Allow the vines to dry.
Step 4

Next, take your size 6 round brush and add a little water to some Emerald Green paint, loosening the consistency a little. On your spare piece of paper, practise making leaf shaped marks with your brush.
I use a light-heavy-light pressure technique to make leaf shapes, making use of the pointed tip of the brush to get the narrow ends of the leaf and the fuller (belly) of the brush to get the wider part.
Look out for more tips on brush techniques and mark making in our Castle Arts Academy painting courses, coming soon!
Step 5


Now make leaf-shaped marks on either side of the vines with your brush, leaving approximately 2cm space on either side at the top and the apex of the heart garland.
The leaves don’t have to be evenly spaced or uniform in size; just go with the flow, allowing a little room for leaves in other colours to be added next.
Step 6

Repeat this process using Prussian Green paint thinned with a little water.
Step 7

Now, mix a little Emerald Green paint with some Cadmium Yellow (I used a mix of about 40:60). Add a drop of water to loosen and paint some lighter green leaves onto your garland. You should scatter the different coloured leaves about until the vines are mainly covered (apart from the space at the top and apex of the heart as before).
Step 8

At this point you can either leave your leaves as they are, or add some detail. I added some vein patterns and shadows with my small, round brush to give a little character, but this is optional.
Step 9

Clean your size 3 round brush and add a drop of water to some Alizarin Crimson paint.
Ensuring that your brush has a good point, paint the outline of a small heart immediately adjacent to your garland. Where you put your hearts is entirely up to you: I thought of mine as being like flowers, and tucked hearts of different sizes amongst the foliage, inside and outside the garland and on different angles, to bring some fun. Repeat to your heart’s desire!
Tip: hearts can be tricky to paint. I like to “draw” mine in two halves with my fine brush, then fill in the heart outline with more paint.
Step 10


To add the bow, take some more Alizarin Crimson paint loosened with a little water and your size 6 round brush and paint a small, oval shaped “knot” in the middle of the top of the garland where the two sides of the vines meet.
Add two bow loops each side of the knot. These should be roughly triangular and overlapping – have a look at the template if you’re not sure. Finally, add two hanging “ribbons” beneath the knot by painting two long thin rectangles with a little fork at the bottom. It doesn’t matter if it isn’t super tidy at this stage – you can refine it when you add detail in step 12. Allow the red bow to dry.
Step 11

Use your small round brush to mix some Alizarin Crimson with a dab of Chinese White and some more with a dab of Burnt Umber.
The lighter red-pink colour can be used to add highlights to the middle of the loops of your bow, the centre portion of the knot, and the mid section of the ribbons to make them look more three dimensional.
The darker red-brown shade can be applied under each of the bow loops, the sides and bottom of the knot, and the top of the ribbons beneath the knot to give the impression of shadow.
Step 12

Using your gold gel pen or fineliner, scatter small dots in and around the garland to add a little whimsy. Allow your card to dry completely.
Step 13

Gently erase any remaining graphite pencil marks and ta-da, you’re all finished!
Step 14

Why not customise your garland with your loved one’s favourite colours or flowers? Or even go gothic for Valentine’s Day, painting on black card and with a limited palette?
Whatever you decide, remember to include a message in your handmade Valentine's card, sign it (or add a question mark for a little mystery!) and pop it in an envelope, ready for that special someone. Or, keep it as a gift to yourself and frame your creation (flowers and chocolates optional!).
Heart Garland Valentine's Card Template

Happy Valentine’s Day from the whole team at Castle Arts - we can't wait to see your DIY Valentine's cards! Why not share your creations with us by uploading them to our Gallery?
Share: